|
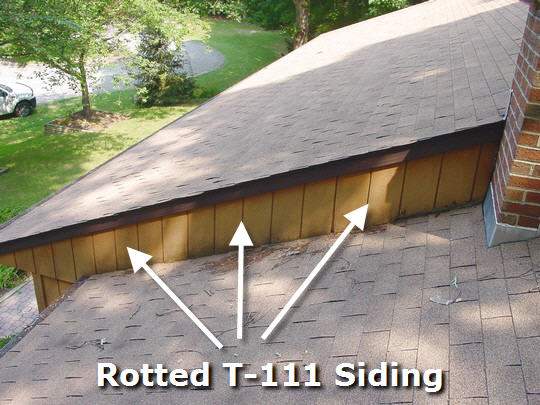
 A home inspection on this house in Hollywood, Maryland
revealed rotting A home inspection on this house in Hollywood, Maryland
revealed rotting
T-111 wood siding and plywood damage in the attic; so we're digging in . . .
|
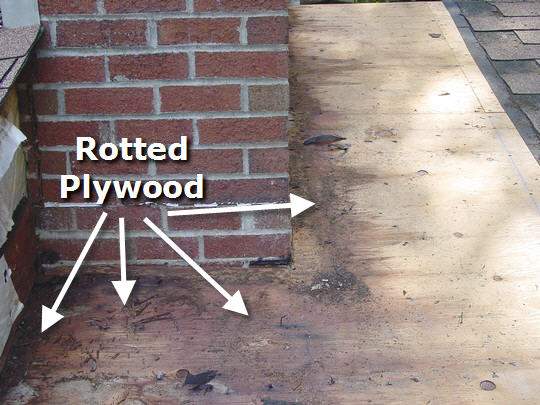
 As expected, we have discovered plywood damage all the way up
the exterior wall and around the chimney. Now for the back . . . As expected, we have discovered plywood damage all the way up
the exterior wall and around the chimney. Now for the back . . . |
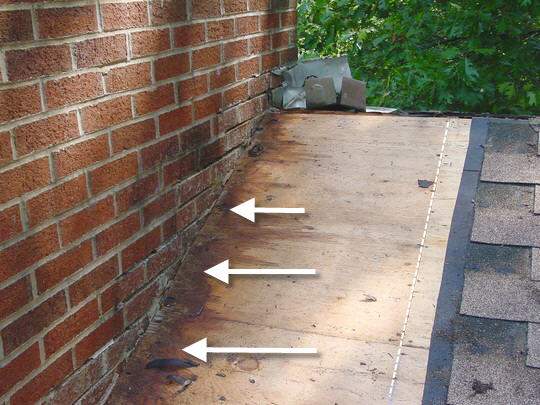
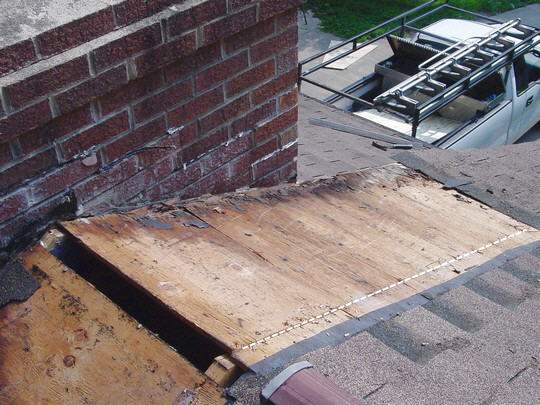
 It's pretty bad plywood rot around the chimney, indicating that
the chimney flashing was leaking for a long time. It's pretty bad plywood rot around the chimney, indicating that
the chimney flashing was leaking for a long time. |
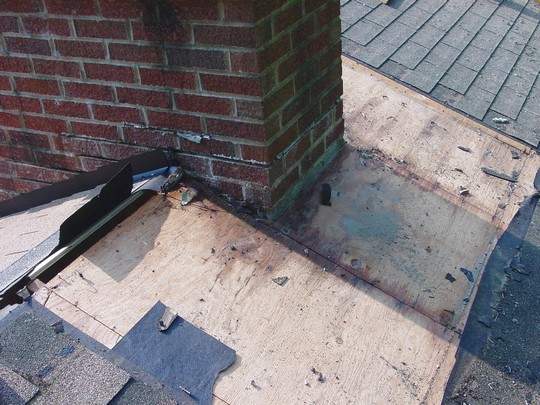
 It's the same story on the back of the chimney. It's the same story on the back of the chimney. |
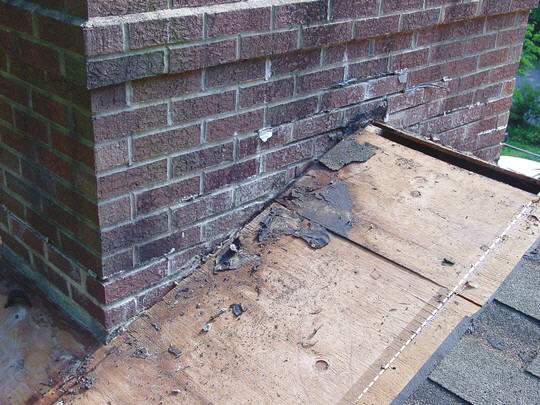
 . . . and on the right side as well. . . . and on the right side as well. |
 |
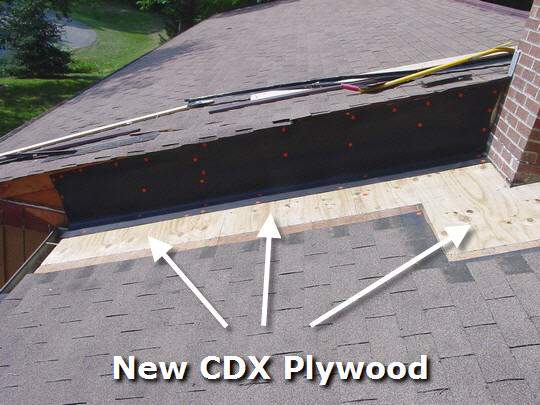
 OK, we've strategically cut the 1/2" plywood, removed it, and
replaced with new 1/2" CDX plywood. We used #10 coated sinker nails to fasten the new roof
deck to the roof rafters. OK, we've strategically cut the 1/2" plywood, removed it, and
replaced with new 1/2" CDX plywood. We used #10 coated sinker nails to fasten the new roof
deck to the roof rafters. |
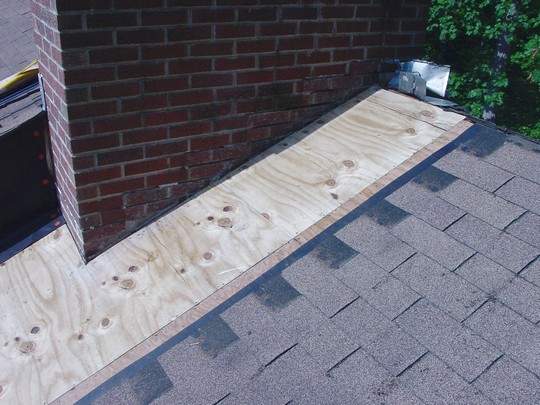
 New plywood was also installed on the right side of the
chimney. New plywood was also installed on the right side of the
chimney. |

 . . . and on the rear of the chimney as well. Evidently
the flashing was leaking around the entire perimeter of the brick chimney. . . . and on the rear of the chimney as well. Evidently
the flashing was leaking around the entire perimeter of the brick chimney. |
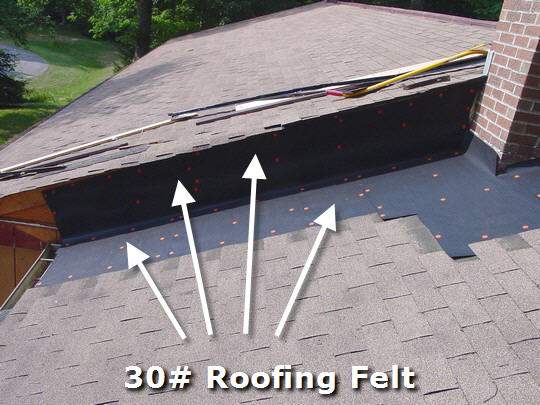
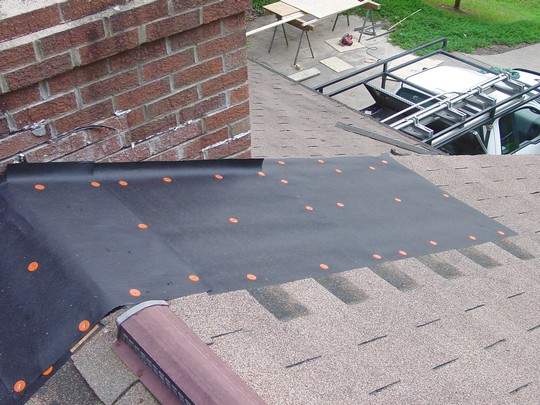
 For the next step we've installed 30 pound roofing felt in the
roofing and wall areas. For the next step we've installed 30 pound roofing felt in the
roofing and wall areas. |
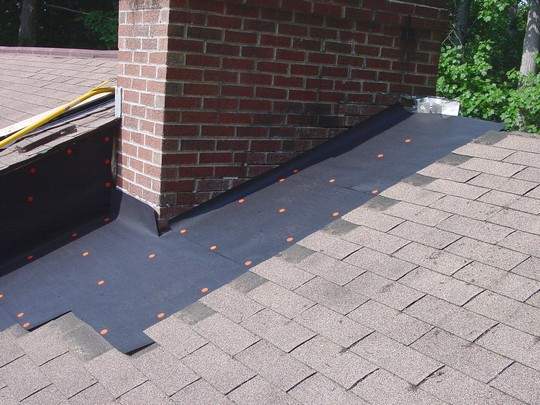
 Roofing tarpaper is applied around the chimney as well. Roofing tarpaper is applied around the chimney as well. |
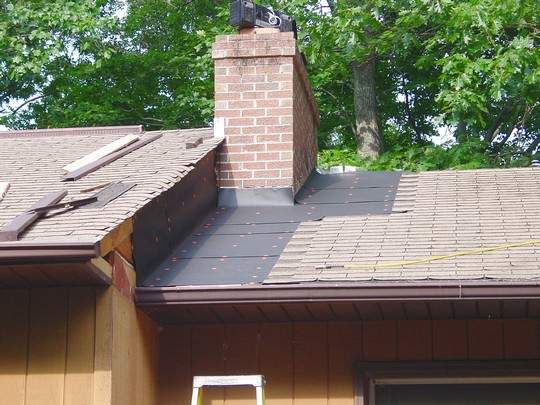
 Now it's time to start nailing the 25 year 3-tab shingles. Now it's time to start nailing the 25 year 3-tab shingles. |
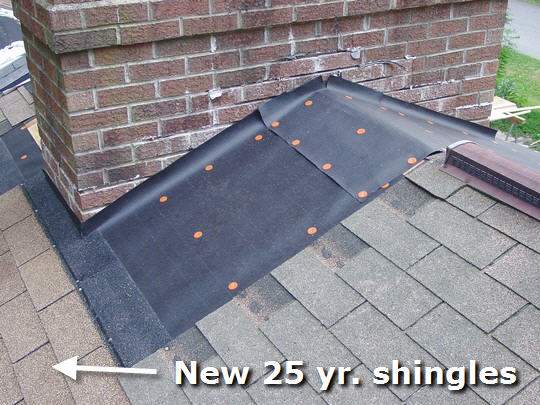
 Notice the orange plasticaps which are the preferred way to
attach roofing felt to the roof deck. Notice the orange plasticaps which are the preferred way to
attach roofing felt to the roof deck. |
 |
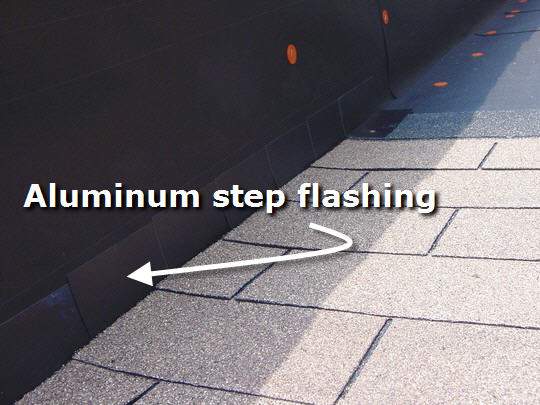
 Integrating the step flashing into the shingles next
to the wall is the proper method for waterproofing this area. It's the overlap and
weaving action that makes this system work properly. Integrating the step flashing into the shingles next
to the wall is the proper method for waterproofing this area. It's the overlap and
weaving action that makes this system work properly. |
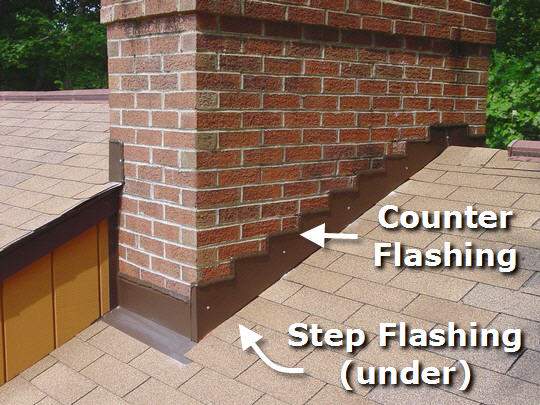
 After the step flashing has been applied in the same manner
around the brick chimney, the custom made aluminum counter flashing is secured and permanently
sealed with Geocel Tripolymer Sealant. After the step flashing has been applied in the same manner
around the brick chimney, the custom made aluminum counter flashing is secured and permanently
sealed with Geocel Tripolymer Sealant. |
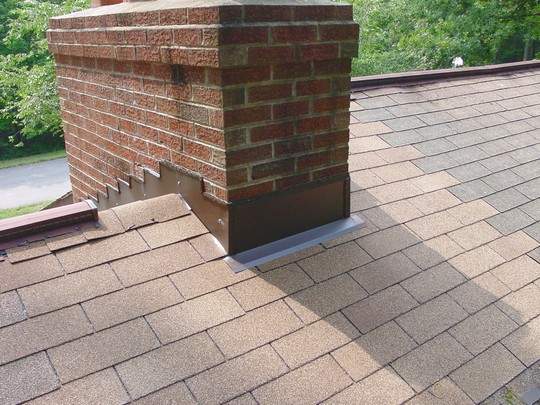
 The custom made flashing assembly will keep the chimney and roof
deck area leak free for years to come. The custom made flashing assembly will keep the chimney and roof
deck area leak free for years to come. |
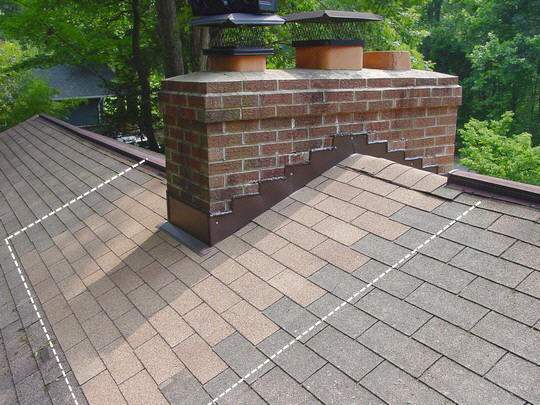
 It's hard to imagine the amount of work caused by a simple
chimney leak. A simple roof maintenance program could have eliminated these repairs and
expense. It's hard to imagine the amount of work caused by a simple
chimney leak. A simple roof maintenance program could have eliminated these repairs and
expense. |
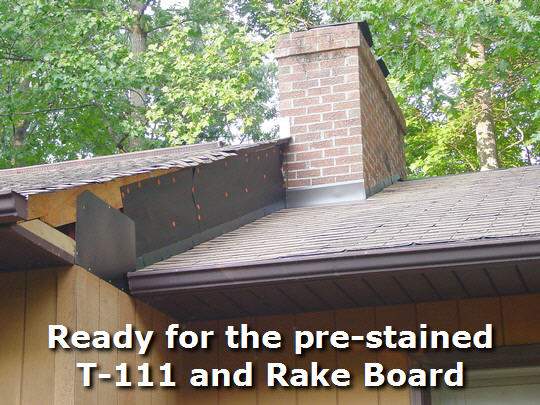
 The roofing and flashing part of the project has been completed
and now it's time to install the prestained T111 wood siding and the prepainted rake board and
trim. The roofing and flashing part of the project has been completed
and now it's time to install the prestained T111 wood siding and the prepainted rake board and
trim. |
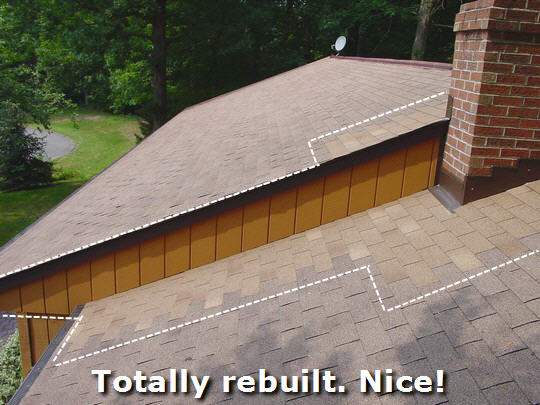
 A good amount of reconstruction work was done here; all
resulting from a little water leak over a long period of time. A good amount of reconstruction work was done here; all
resulting from a little water leak over a long period of time. |
 |

